
If you’re running a small Kubernetes homelab and want persistent storage with redundancy, Longhorn is an excellent choice. 🚀
Longhorn is a lightweight, cloud-native distributed block storage system for Kubernetes. It allows you to create highly available volumes, replicate data across multiple nodes, and manage persistent volumes without relying on external storage appliances. For homelabs or edge clusters, it’s perfect because it runs entirely inside Kubernetes and is easy to manage through a web UI.
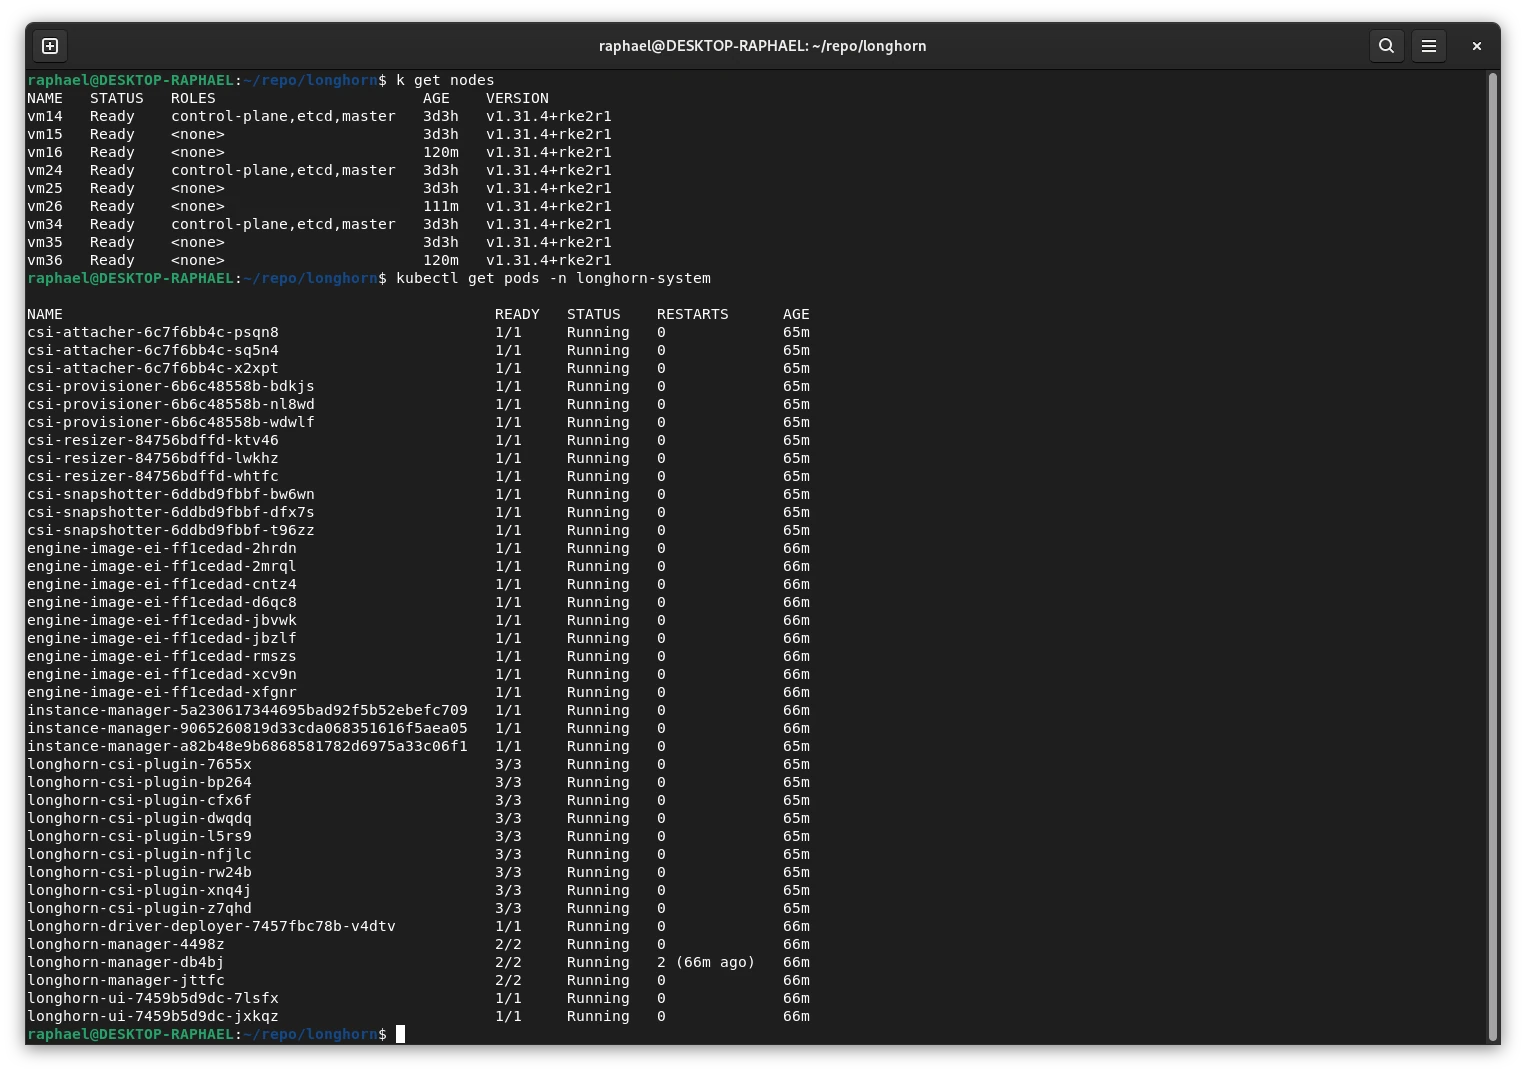
Before I started, I created on each Proxmox server a small additional VM with 50 GB of disk specifically for Longhorn volumes. Then I ran my Ansible playbook to configure these three VMs as Kubernetes worker nodes. 💻
In my setup, I wanted redundant, reliable storage for small workloads and test environments, but without overloading my limited VM disks. The optimal solution would be to attach Longhorn storage to the workers using a dedicated additional partition. Since I am only running small test apps like WordPress or Nextcloud and do not need production-grade reliability, I decided to use the root partition for Longhorn, carefully monitoring disk usage via the Longhorn GUI to avoid exceeding available space. 🎯
1. Install Helm
If Helm is not yet installed on your system, you can install it via Bash and curl:
curl -fsSL -o get_helm.sh https://raw.githubusercontent.com/helm/helm/main/scripts/get-helm-3
chmod 700 get_helm.sh
./get_helm.sh
helm version
2. Add the Longhorn Helm Repository
Add the official Longhorn Helm repo:
helm repo add longhorn https://charts.longhorn.io
helm repo update
This allows you to fetch and install Longhorn charts easily.
3. Label the Worker Nodes
Before installation, label the worker nodes so Longhorn only deploys there:
kubectl label node vm16 longhorn=true
kubectl label node vm26 longhorn=true
kubectl label node vm36 longhorn=true
4. Prepare the Helm Chart Locally
To customize installation, download the chart locally:
helm fetch longhorn/longhorn --untar
cd longhorn
This lets you edit values.yaml before deploying.
5. Adjust the values.yaml
Important changes in values.yaml:
- Namespace:
longhorn-system– isolates Longhorn resources. - ReplicaCount: 2 – ensures redundancy for Longhorn engines.
- Storage Path:
/var/lib/longhorn– root partition is used for testing; in production, a dedicated disk is recommended. - NodeSelector:
longhorn=true– ensures pods are scheduled only on labeled nodes. - UI NodePort: left as default – for homelab access.
6. Create the Namespace
kubectl create namespace longhorn-system7. Install Longhorn via Helm
helm install longhorn ./longhorn --namespace longhorn-system -f values.yamlHelm will deploy Longhorn with the settings from your customized values.yaml.
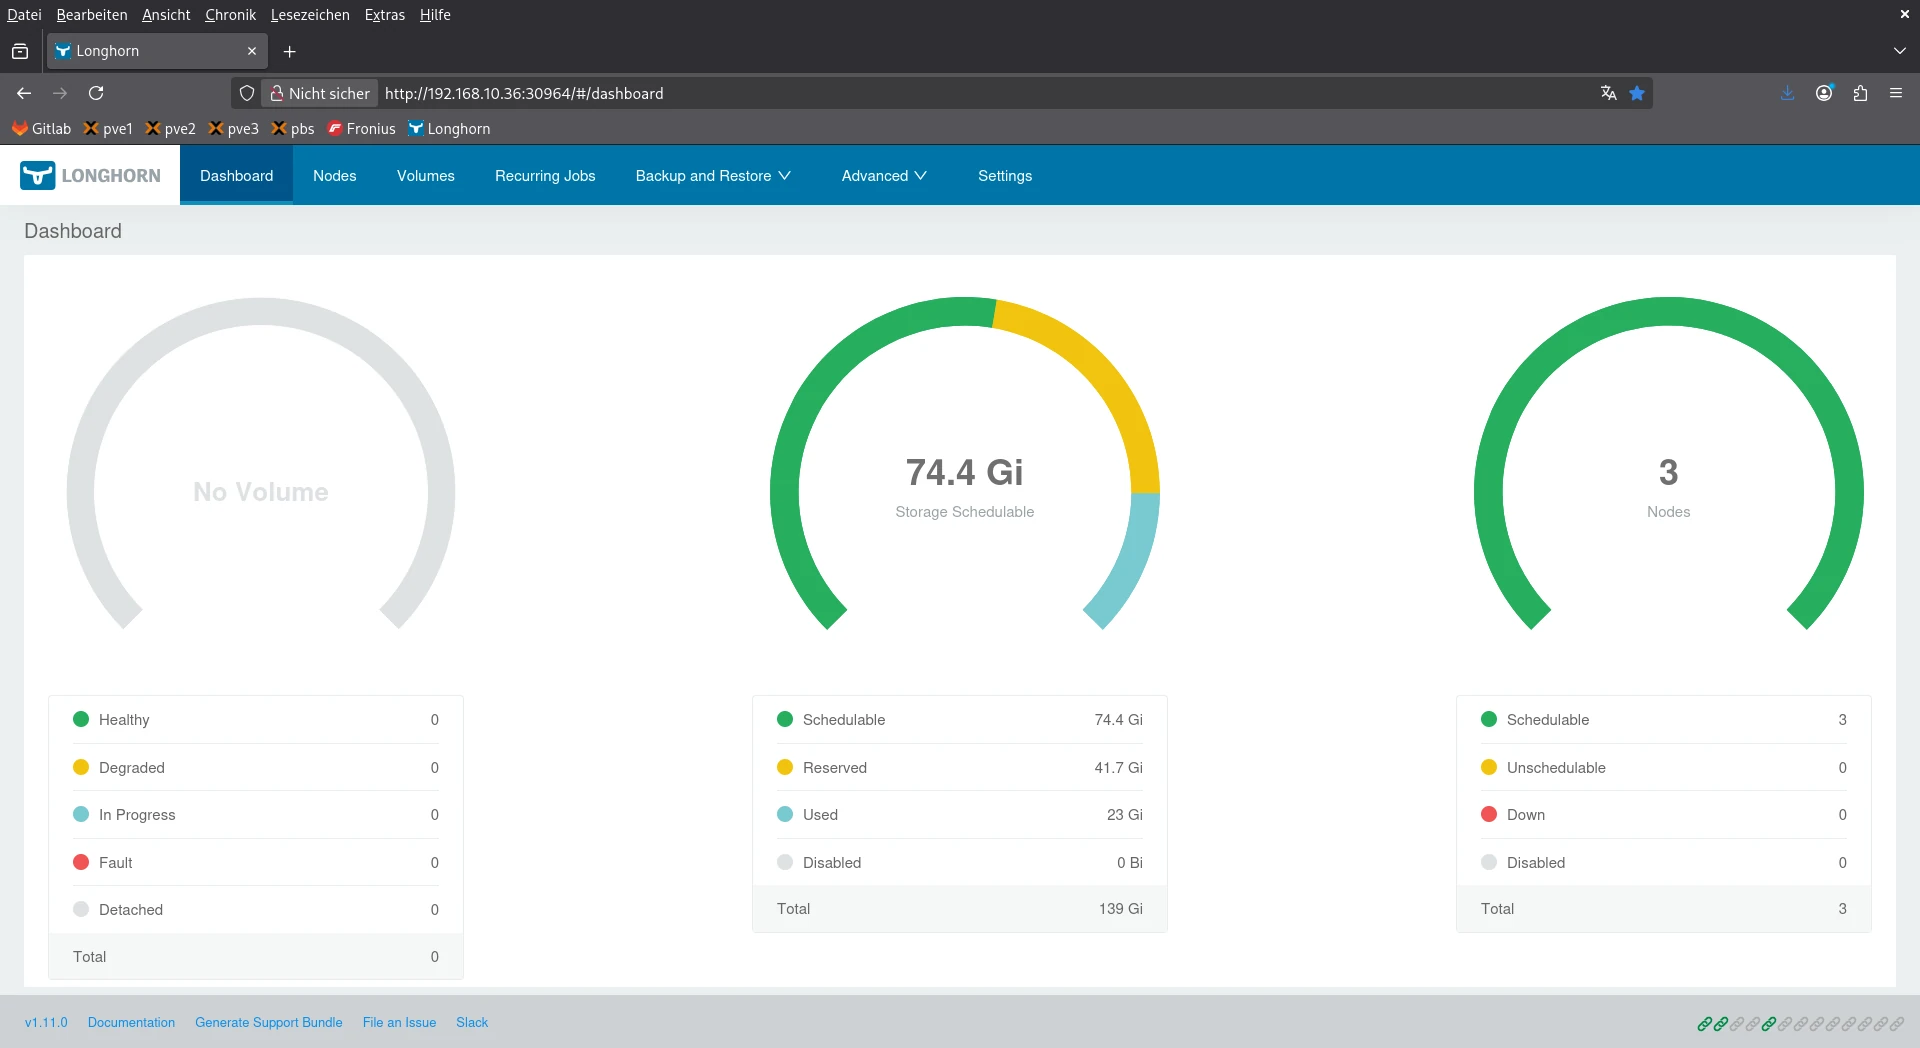
8. Check the NodePort for the UI
kubectl get svc -n longhorn-system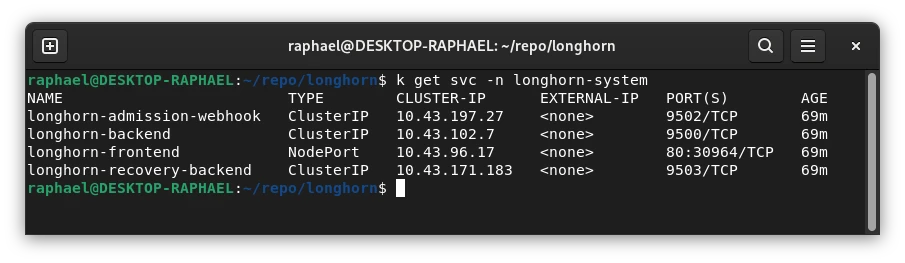
Access the UI from any worker node:
http://<worker-node-ip>:309649. Manage Disk Limits
Since my VMs don’t have extra disks, I limited Longhorn storage to a portion of the root filesystem via the Longhorn GUI. This prevents accidental full-disk usage. In production, use a dedicated disk or partition for Longhorn volumes.
10. Upgrading / Changing Values
helm upgrade longhorn ./longhorn --namespace longhorn-system -f values.yamlAdd --install if the release may not exist. Helm will then install or upgrade safely.
✅ Result
- Longhorn runs in its own
longhorn-systemnamespace - UI is accessible via NodePort
- Storage path and disk limits respected
- Components only on labeled nodes
- Upgrade and replacement of values work without reinstalling
This setup is ideal for small homelabs, providing highly available persistent volumes in Kubernetes, a friendly UI, and full control over storage usage. 🎉
And finally, in my next WordPress blog post, I will install a test app where I will leverage Longhorn with PersistentVolumeClaims (PVCs), demonstrating how applications can directly use the volumes managed by Longhorn for persistent storage. 🖖